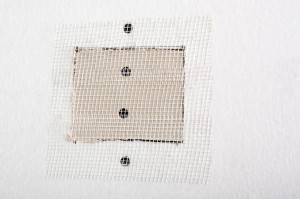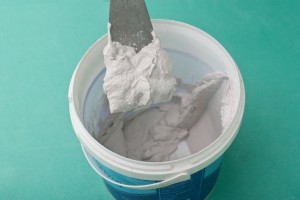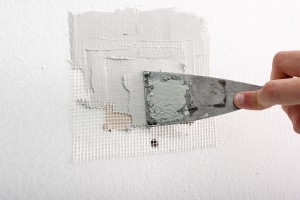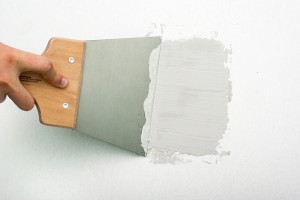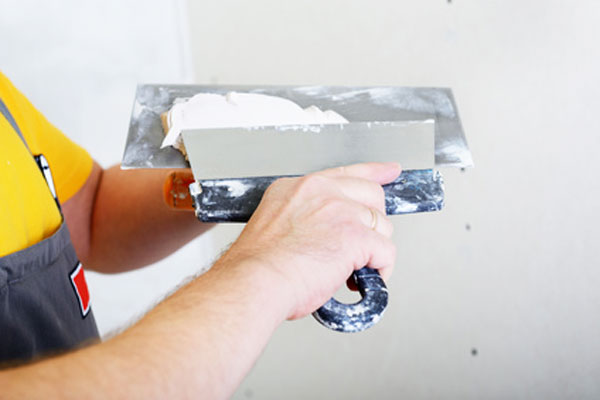
Featured

Drywall Repair Tools

This step by step diy article is about drywall repair tools. Fixing drywall holes, dents and scratches is not as complicated as it might seem at first, especially if you get accustomed with the main techniques, materials and tools.

While we discuss the other aspects in the rest of our articles, in this post we highlight the main tools required for this kind of projects, along with briefs explanations about their role and utility.Pay attention to the tips and plan every project thoroughly.

As in any other project, the preparation steps are maybe the most important. Therefore, we recommend you to assess each repair individually and afterwards to choose the materials and tools needed. The best part is that most of the tools are quite cheap, you can get the most basic tools for repairing drywall at under 50 dollars. If you clean them after using them, we can assure you that you have made a lifetime investment.


Tools needed for repairing drywall

Drywall repair tools


In order to repair damaged drywall, such as dents, holes or scratches, you need to use the right tools and to lean the basic techniques. While in other projects we show you the right methods to fix drywall for each situation, in this article we show you the right tools for the job.

Useful Tips: While you don’t have to buy all these tools for minor repairs, we still recommend you to have them in your toolbox, as you don’t know when you have to tackle a complex project.


Drywall repair tools

Utility knife


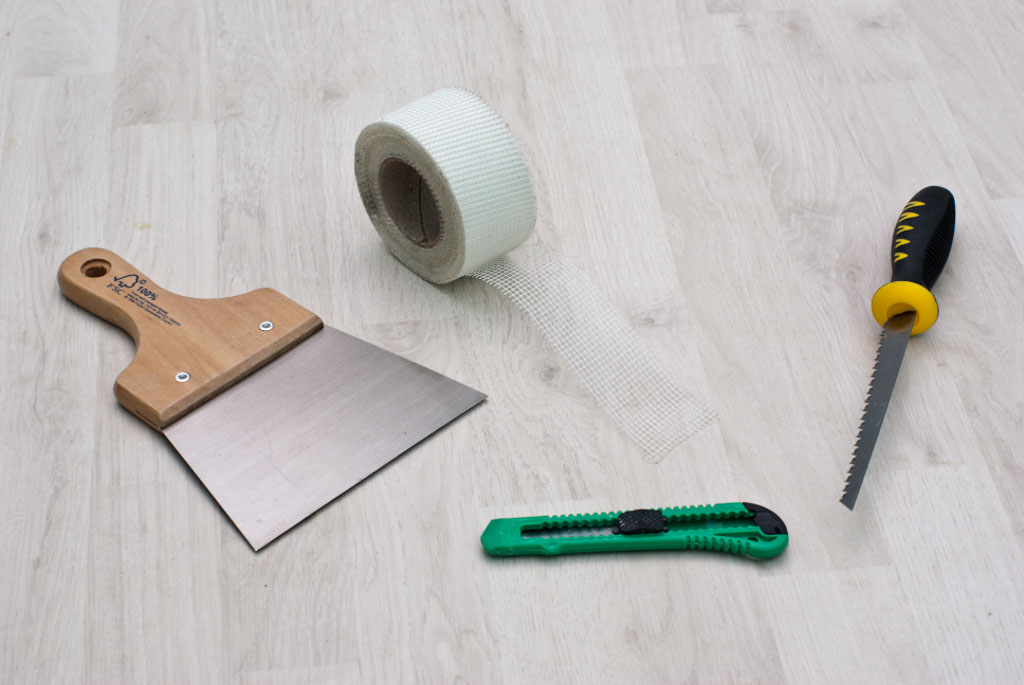
First of all, you need to buy a good utility knife, as it is an essential tool when repairing drywall. On one hand, you are going to need one when cutting the mesh or tape to the right size. On the other hand, this tools is very useful when cleaning the damaged areas and removing the loose paper and debris.

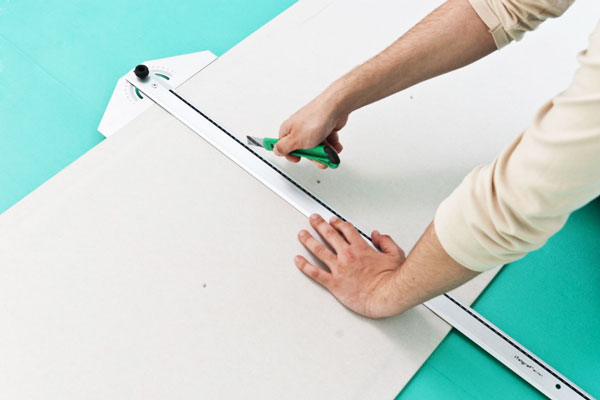
Useful Tip: In addition, you are going to need a good utility knife for cutting drywall sheets to the needed size.
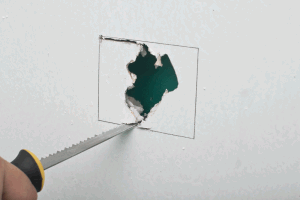
 

Cutting out the hole


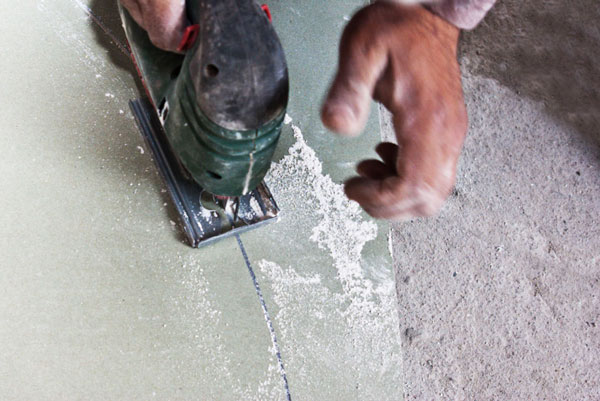
In addition, a drywall saw is an extremely handy tools, as you can use it in many different situations. On one hand, this tools is great for cutting circular or rectangular holes in drywall, as the blade is narrow and sharp. Just punch the tip trough the wall and cut along the marked lines.

Moreover this tools is indispensable when cutting out a damaged area, as you can get the job done in just a few minutes. Alternatively, you could use a jigsaw or a saber saw, but they are a lot more expensive.


T-square


You also need a T-square for your drywall projects. The square is ideal for marking the cut lines.


Securing the patch to the support


If the damaged area is large, you need to cut it out and install a patch, having the same thickness with wall, to a backer support. In order to secure the patch into place, we recommend you to use a good screwdriver with torque control.

Useful Tip: Make sure you don’t over-tighten the screws, otherwise they might damage the paper layer. The heads of the screws have to be just under the surface of the wall. In this manner, you can cover the small cavities with mud and get a smooth surface.


Narrow putty knife


Next, you should get yourself a narrow putty knife, as the one in the image. This tools is ideal for filling dents in drywall or for mixing small quantities of mud.

Taking into account that a small drywall knife is very cheap, there is no reason you shouldn’t get one for your projects.


6'' wide putty knife


For applying the first coat of mud over the repaired area, a 6” taping knife is a must have. This tools is maybe the most versatile, as it allows you do make many repairs even without having the rest of the tools.

Useful Tip: Nevertheless, if you want to obtain a professional result, you should also take a look on the rest of the complementary tools, as they can add value to any drywall repair project.


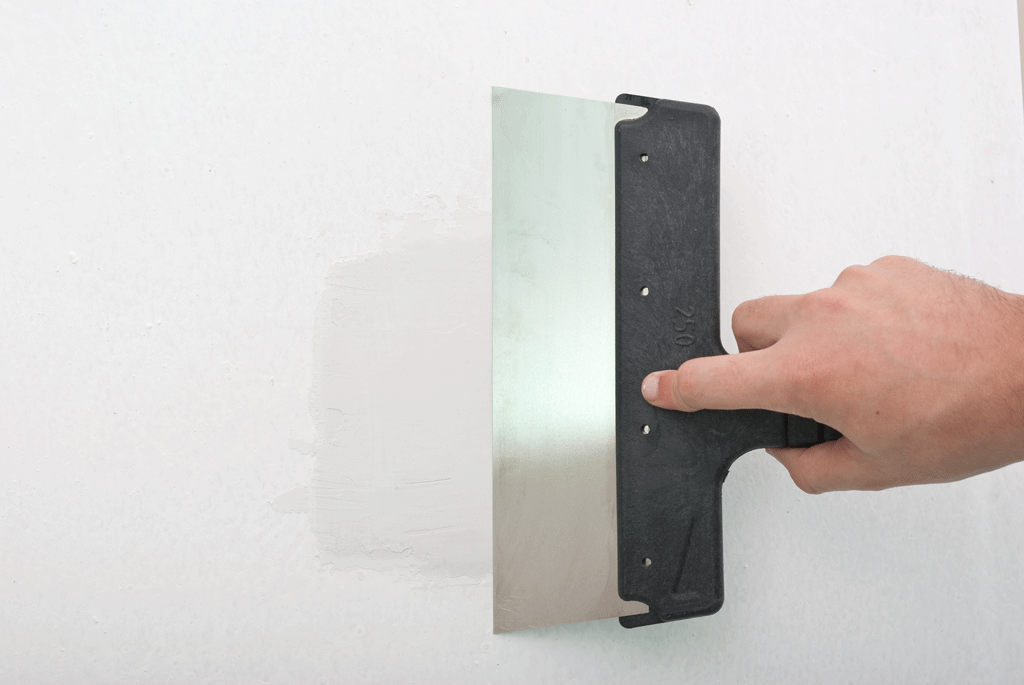
10'' putty knife


A 10” putty knife is a great tool for drywall repairs, as you can spread the second coat of compound properly. As compared to the first layer of mud, the second one has to be about 1-2” further in all directions.

Useful Tip: In this manner, the transition between the patch and the wall will be hardly noticeable and the result professional.


Large drywall knife


A 14” putty knife is not essential for small repairs, but is highly recommendable for serious projects. If you have to mud a large patch, you just cannot get the job properly, without using a large tapping knife.


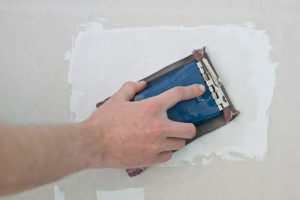
Sanding block


You have to smooth the irregularities on the drywall patch using a sand block. Use circular moves to even out the patch, otherwise the transition between the repaired area and the rest of the wall will be highly visible to  anyone.

Useful Tip: It is essential to pay attention to the edges of the patch if you want to obtain a neat look. Using the right techniques and tools will make the repair unnoticeable, even to you.


Drywall-repair_


Last but not least, you should get yourself a good drywall repair patch, as it is the easiest way to fix holes. These kits are affordable and and come with all the materials you need to fix the surface.


Thank you for reading our project about drywall repair tools. Check out the rest of the project if you want to learn drywall repair tricks and techniques. LIKE us on FACEBOOK for more updates.

Featured

How to fix a large hole in drywall

This step by step diy article is about how to fix a large hole in drywall. If you are a homeowner, you probably faced several situations when you had to cope with different drywall issues. While some of them, such as dents or scratches, are easy to fix, other are more complex and require more skills, attention and knowledge. Repairing large holes in drywall falls into this category, as you need to prepare the damaged area before fitting the patch and spreading the coats of mud.

In order to make the repair, you need to cut a large patch of a sheets of drywall, having the same thickness as the wall. Usually the walls are made out of 1/2” drywall, while the ceilings out of 5/8” drywall. In addition, a regular sheet measures 4×8′, but for a small repair it is way too large. Therefore, you should rather buy a 2×2′ or 4×4′ sheet, which can also be found at most of the diy stores.


Materials

 Small drywall sheet

 Drywall compound and 1 1/4” screws

 1×2 lumber, Fiberglass mesh

 Fine-grit sandpaper

Tools

 Safety gloves, Eye protection, Respiratory mask

 Electrical screwdriver, Drywall saw

 Utility knife, Putty knife

 Small bucket, Sand block

Tips

 If the hole is larger than 4”, you need to install several backing supports

 Smooth the edges of the damages are, before filling it with compound

Time

 One day


Repairing a large hole in the wall

Tools for fixing holes in drywall


Fixing a large hole or punch in drywall might seem a complex project, but we can assure you the repair can be done by any homeowner, as you just need to prepare the surface thoroughly and to fit a patch, having the same thickness as the wall.

Useful tip: Cut out the damaged area with a drywall saw, making it square or rectangle. In this manner, you can cut the patch easily and fit it into place easily. Use an L-square to mark the cut lines on the wall and on the drywall sheet.


How to fix a large hole or punch in drywall

Fixing holes in drywall


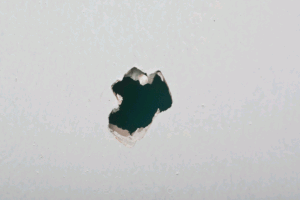
First of all, you need to assess the damaged area. Therefore, if the hole in the wall is larger than 4”, then you need to make it square or rectangle and install a backing support. Nevertheless, before doing all these steps, you really need to check if behind the hole are pipes or electric cables, otherwise you might make the damage even worse.

After making sure there are no obstacles behind the hole, check if the back paper layer is in a good condition and mark the outline of the hole on the front paper layer.


Cutting out the hole


In order to obtain a professional result, you have to use a pencil and an L-square. In this manner, you ensure the corners of the hole are right angled. The next step of the project is to cut out the damaged area, along the cut lines. Use a drywall saw or a keyhole saw, to get the job done accurately, especially that you can find this tool at any diy store under 5 dollars.

Useful Tip: Do not hurry or use too much force, otherwise you might damage the edges of the hole.


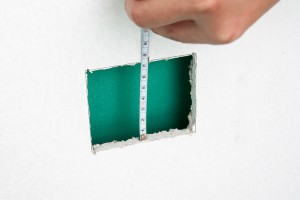
Measuring the hole in drywall


Afterwards, measure the height and the width of the hole, using a measuring tape.


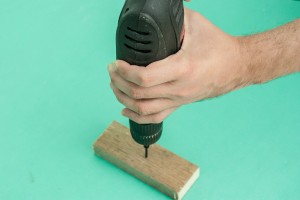
Inserting a screw into the backing support


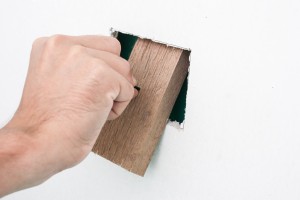
We need to know the height of the hole as to cut the backing support. As a general rule, you should cut the support from 1×2 or 1×3  lumber and make it about 2” larger than the height of the hole. After performing the hole with a jigsaw, we need to fit a drywall screw in the middle of the wooden support.

Useful Tip: You need to insert the screw into the support as to fit it easily into place, as well as to hold it while driving in the screws trough the wall in the backing support.


Fitting the backing support


Fit the backing support inside the hole and center it properly. Meanwhile get a drill machinery with torque control, in order to lock the support into place with screws.


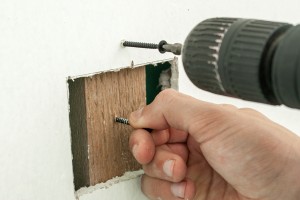
Attaching the backing support to the wall


Hold the backing support into place while driving screws trough the wall, at both ends of the wooden strip. Make sure you don’t over-tighten the screws, otherwise you might damage the surface of the wall. Nevertheless, the head of the screws should be just under the wall’s surface.

After securing the backer board to the wall, you should remove the screw placed at the middle. If you have followed our instructions and you have worked with good judgement, you are ready to cut out the patch.


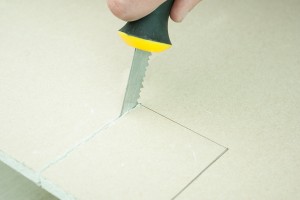
Cutting the patch


In order to get the job done properly, we recommend you to use a drywall scrap piece of the same thickness as the wall. This aspect is essential, otherwise the patch won’t be at the same level with the rest of the wall.

Mark the outline of the patch on the drywall sheet and cut it gently with the drywall saw. Make sure you don’t damage the edges or the paper layers, while making the cut.


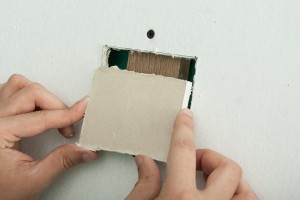
How to fix a large hole in drywall


Fit the paper layer into place and check if the gaps between it and the wall are no larger than 1/4”, otherwise you have to cut a new piece, this time properly. Moreover, you don’t have to force the patch to fit into place, as you might damage it easily.

Continue the project by securing the patch to the backing support with several screws. As we have already emphasized, the head of the screws should be slightly under the surface of the wall.


Covering the patch with fiberglass mesh


Cut several pieces of fiberglass mesh and cover the patch, as in the image. Alternatively, you could also use drywall paper, but over the time we have got better result with the fiberglass mesh. Make sure the strips overlap a little, otherwise the compound might crack on the long run.

Useful Tip: The fiberglass mesh has adhesive on side, so you can stick it to the wall easily. Cover all the edges with tape, before preparing the drywall compound.


Mixing drywall compound


Pour a small quantity of water in a clean bucket, before adding the drywall compound powder. Let it soak some water, before mixing it thoroughly, as to activate the molecules in the compound. Dump the powder gradually, otherwise the compound will be lumpy.

Useful Tip: Use a small putty knife to mix the mud, until you get the consistency of tooth paste. If the drywall compound doesn’t slip off the knife and it isn’t lumpy, it is ready to use.


Spreading the first step of compound


The next step of the project is to spread the first coat of drywall mud over the patch. Use a small putty knife to make the layer as smooth and even as possible. Pay attention to the transition between the patch and the wall, otherwise the repair will be noticeable.


Fixing a large hole in drywall


It is almost impossible to get the job done with just one layer, therefore you shouldn’t be worried if the surface has some irregularities. Use a 6″ drywall knife to spread the mud evenly. Let the mud to set up a little, before spreading the second coat.


10'' putty knife


After the first coat has dried a little, you should apply the second layer of mud. In order to get the job done in a professional manner, we recommend you to use a 8-10” wide putty knife. Apply the drywall compound as even as possible, making sure there are very few irregularities on the surface.

Useful Tip: If you cannot make the transition between the patch and the wall even, then you have to apply another thin coat. Apply the compound in a “+” pattern.


Letting the mud to dry out


After spreading the mud over the patch, you should let it dry out overnight. You should remember that compound that has set up, isn’t completely dried out. Therefore, you need for at least 8 hours before sanding the surface.


How to fix a large hole in drywall


Last but not least, you have to smooth the patch with fine grit sandpaper (anything between 100 and 120). Therefore, after the mud has dried out properly, you need to sand the patch thoroughly, using circular moves. Make sure the transition between the patch and the rest of the wall is gradual, otherwise you need to spread a new coat of mud.

Useful Tip: Clean the dust with a dry cloth and apply the primer. Afterwards, paint the large patch with the matching color.


Thank you for reading our project about how to fix a large hole in drywall. Check out the rest of the project if you want to learn drywall repair tricks and techniques. LIKE us on FACEBOOK for more updates.

How to Hide Pipes with a Drywall Box

This step by step diy article is about how to hide pipes with a drywall box. The story behind this project is simple: we needed the pipes that run from the first floor to the attic for the solar water heating system and we had to come up with a clever solution to hide them. Therefore, we decided to make a simple drywall box along the corner of the room and hide the unaesthetic pipes. You can also install a small access door in case you need to work with the pipes, but since this is a bedroom / office room, we decided to keep it smooth.

This is a house with a masonry walls, so the easiest way to frame the box was to use metal studs. However, you can use lumber as well and follow the same steps. Make sure you use a spirit level to plumb the vertical sheets when framing the hide box. Moreover, use an L-square to make sure the corners are perfectly right angle. Usually the lack of attention to details makes a simple drywall project like this a failure.


Materials

 Drywall sheet

 Joint compound

Metal studs

Fireberglass mesh

Tools

 Safety gloves, Eye protection, Respiratory mask

 Electrical screwdriver, Drywall saw

 Utility knife, T-square, Knifes

Tips

 For 1/2” drywall use 1-1/4″ drywall screws; for 5/8” drywall use 6 x 1-5/8″ screws

 Wear a respiratory mask when sanding the drywall sheets

Time

2 days


How to make a drywall hide box for pipes


How to Hide Pipes with a Drywall Box

Fitting-the-metal-tracks-along-the-walls

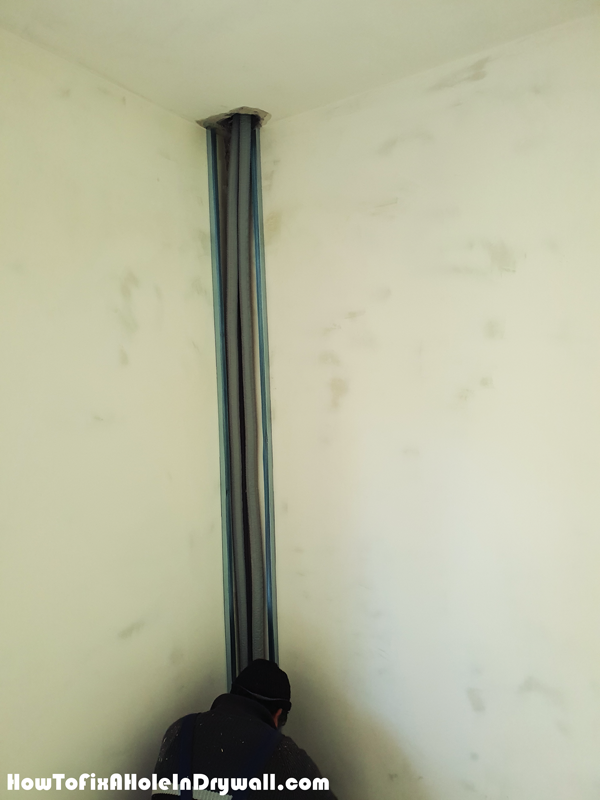
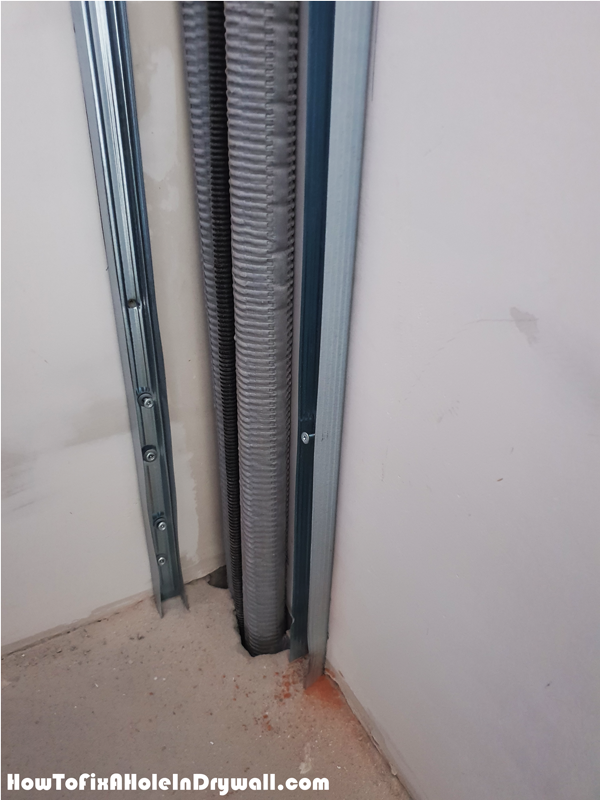
The first step of the project it o build the metal studs along the adjacent walls of the room. Make sure you place the studs as close as possible to the pipes, so you keep the cover box as small as possible. Use a spirit level to plumb the studs and then lock them to the walls with screws.

Metal-tracks-for-the-rywall-box

As you can see in the image, the metal studs need to go all the way down to the floor and wall the way up to the ceiling.

Fitting-the-drywall-pieces-to-the-corner-box

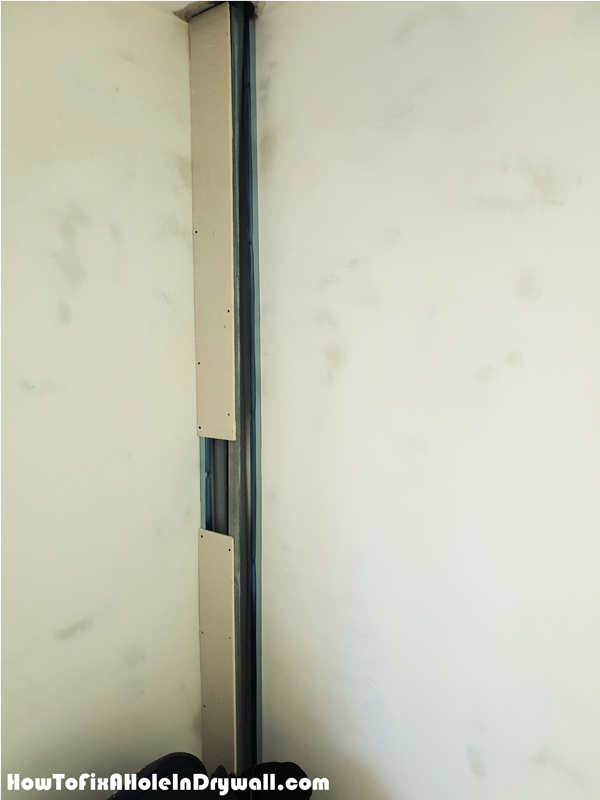
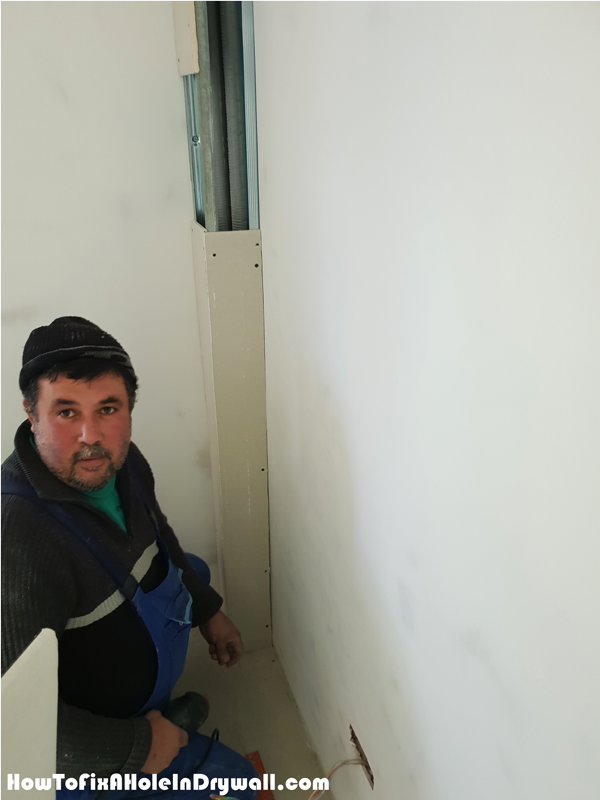
Next, cut the drywall to the needed dimensions and screw it to the metal studs, Notice you need to add another stud to the outside corner of the box, so you can have a support for the drywall sheet. Use a spirit level to make sure the box is plumb on all sides.

Making-the-corner-drywall-box

Attach the drywall sheet to the other side of the cover box. Make sure the corners are right-angled.


Step 2: Mud the Drywall Hide Box

Mudding-thecorner-wall--drywall-box

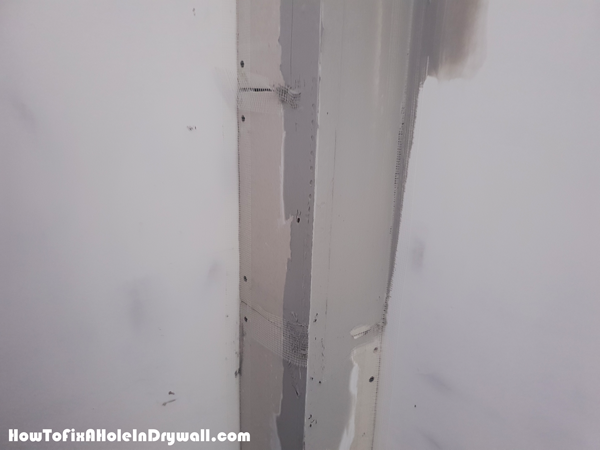
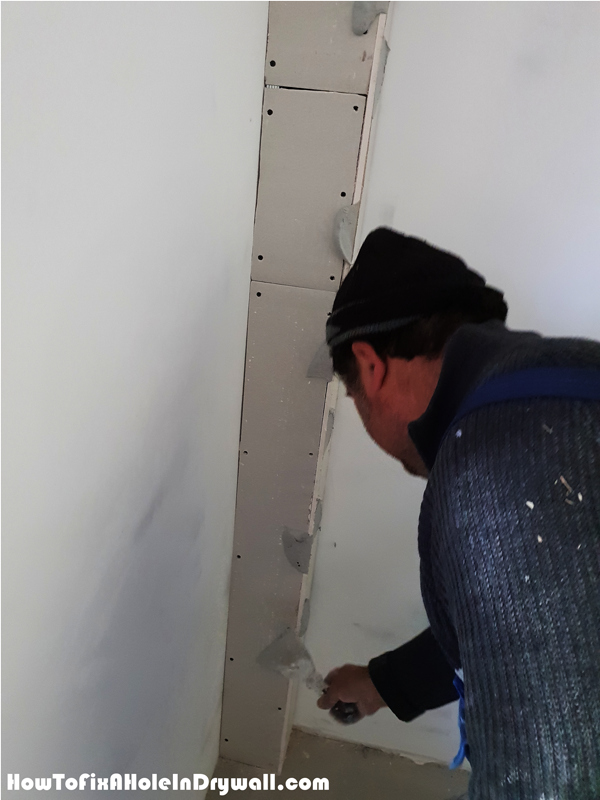
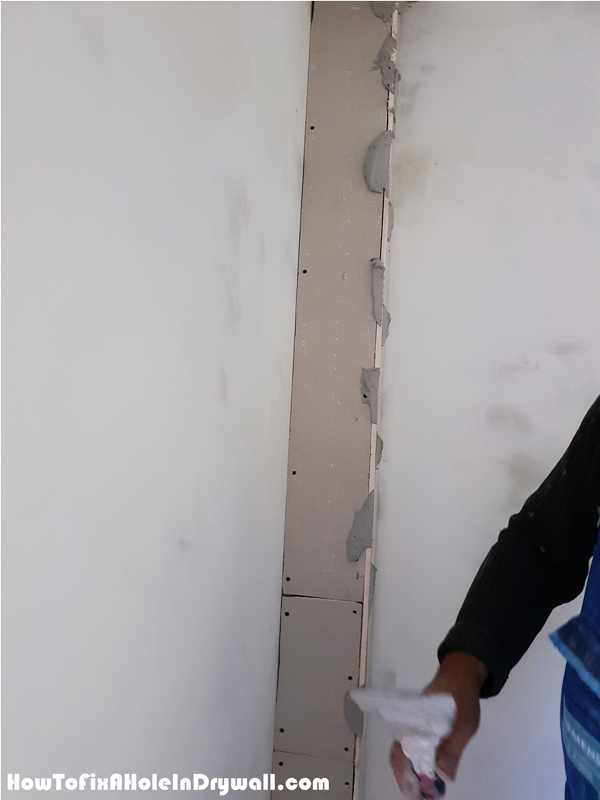
Once you have assembled the pipe cover box, you need to take care of the finishing touches. Therefore, we need to tackle first the outside and inside corners. Mix some mud and then apply it to the outside corner with a trowel.

Mud-over-the-outside-corner


Applying-fibergass-mesh-over-the-joints

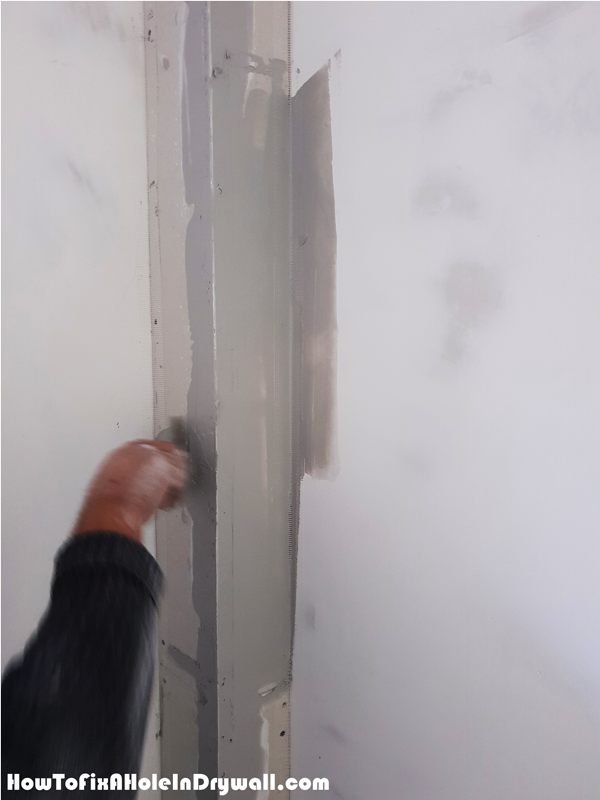
Cut fiberglass mesh and then apply it over the inside and outside corners and press it into the mud. Also add the mesh over the joints. The mesh will reinforce the joints and corners and prevent the future cracks.

Mudding-the-fiberglass-mesh-over-the-drywall-box

Use the trowel to cover the mesh with compound. Make sure you spread the mud as evenly as possible. Let the mud dry out for one day, before you can spread the second coat.

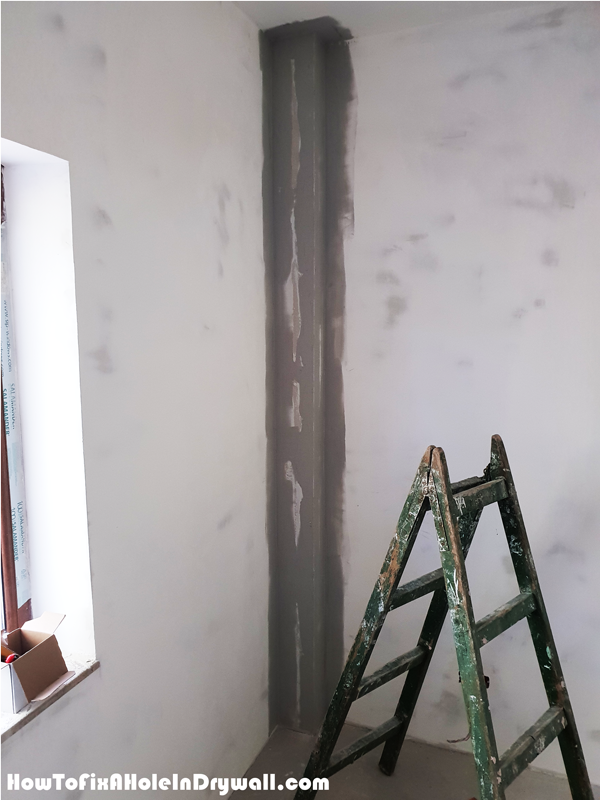
Second-coat-of-mud-over-the-drywall-coner-box

Apply mud over the whole drywall surface and make sure it is smooth. Let it dry out for one day and then sand the surface thoroughly with coarse and fine grit sandpaper.

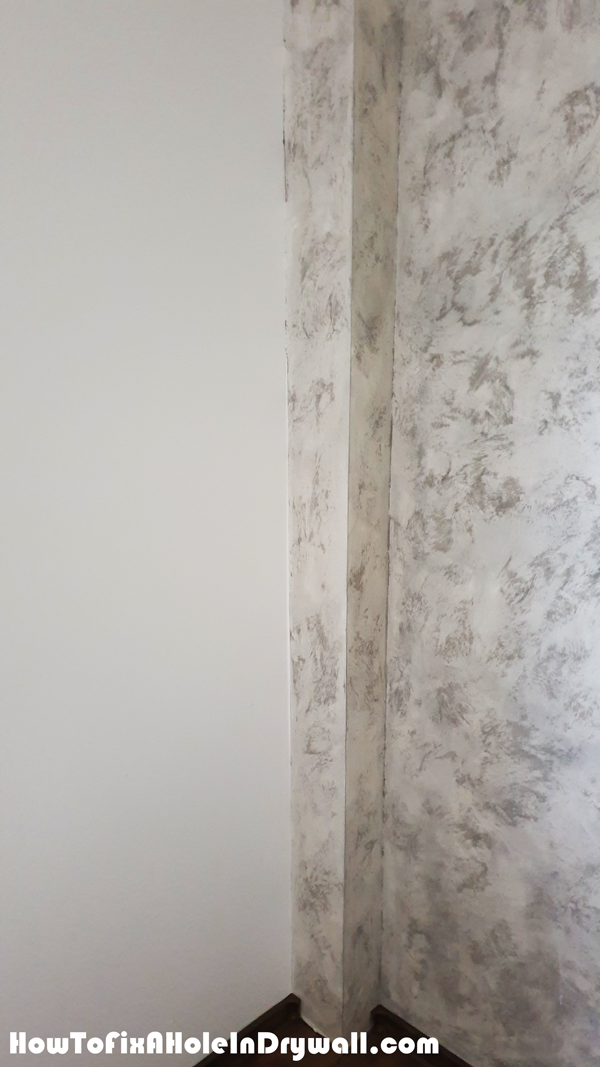
How-to-hide-pipes-with-a-drywall-box

Last but not least, paint the hide box to suit your tastes. As you can see, this is a quick drywall project that you can tackle in a few hours added over a couple of days. This is a simple and efficient method to cover pipes and other items that can ruin the look of your room.


Thank you for reading our project about how to hide pipes with a drywall box. Check out the rest of the projects if you want to learn drywall repair tricks and techniques. LIKE us on FACEBOOK for more updates.

DIY Brick House

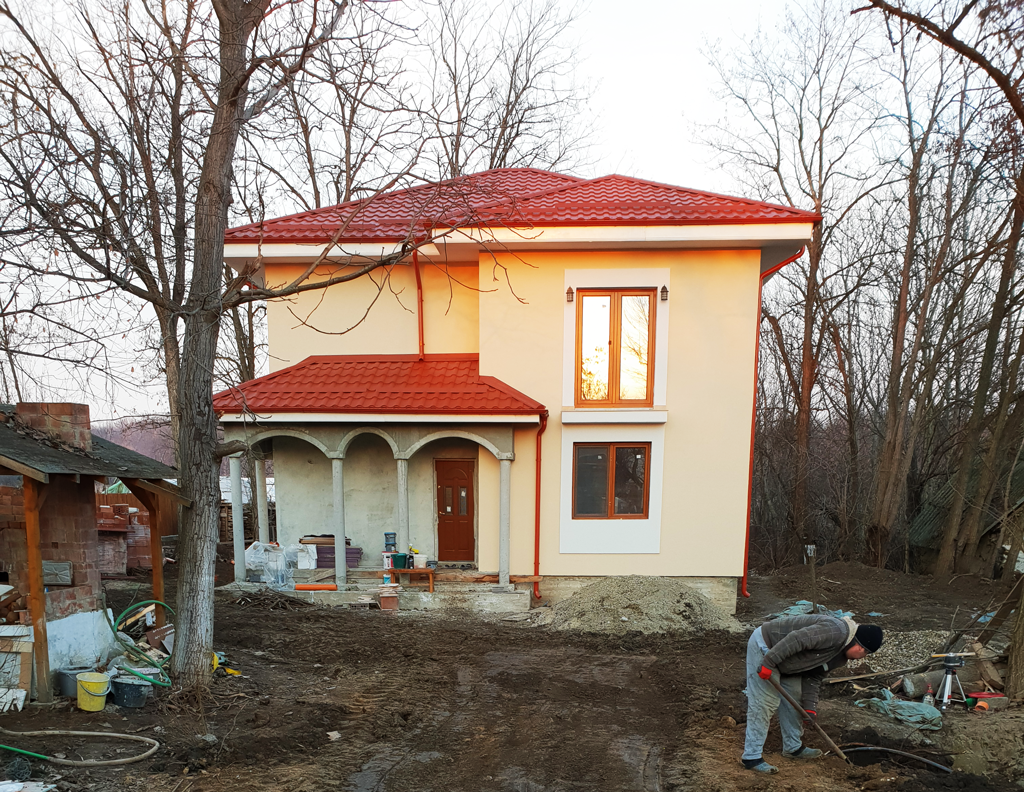
A brick house is a serious commitment, because in most cases from start to finish it will take about 2 years. There are 2 stages of the brick house construction, building the house and then taking care of the finishes. This house needs a strong concrete foundation that is reinforced by rebars.

However, if you weight the benefits of this type of construction, you will soon be questioning what route to choose: lumber or brick? This is the questions. Bricks have been used in constructions for thousands of years, but few know that they have evolved over the past years. The modern bricks are larger and have hollow chambers for higher insulating efficiency. In addition, modern bricks are affordable and very strong to impacts. Along with the concrete pillars, ceilings and foundation, the brick walls will be very durable and fire and water proof. Many advantages you need to think of, when making a choice. I have other projects here. 

Beside the disadvantage of time, a brick house is also a lot harder to remodel or to make new additions. It is not impossible, but there is more hustle involved. Therefore, when you do the planning you need to know exactly what you want and what you can afford. I have witnessed cases in which people designed and started pharaonic buildings and they stopped midway because of lack of budget. So my honest advise is to decide the budget and have 15% extra for other costs that you cannot estimate initially.
[youtube id=”vgxabQujgNA” width=”600″ height=”350″]

Generally speaking, you need 100 kg of rebars for a cubic meter of concrete. You need to dig the foundation at more than 1 m (frost line). However, these details will be decided by the engineering and architectural team.

Brick house

Another tip I have for you is to know that the budget will be split in the following manner: 1/3 of the budget will cost the house structure and 2/3 for the finishes.

You need to pour concrete ceilings because they will keep the brick house well tighten together. The concrete ceilings need a thick net of rebars because the spans are large. That is why you need proper engineering, especially if you live in an area with seismic activity.

When pouring the foundation, you need to have in mind the routes of the utility pipes (water, electricity, plumbing, etc.). Follow the brick house plans with attention so you know they are implemented properly.

Use a spirit level to check if the brick wall are plumb. Use builders string to check if the walls are perfectly straight. Even if the contractor has proper recommendations you need to check the quality of the execution by yourself. Be strict with the materials and prevent the waste because that will influence the total costs really quickly. Since you build an amazing house, you can also add a large pavilion, so you can have a place in the backyard, where to hang out with family and friends. 

Make sure you select a contractor that has experience in building brick houses and also has all the tools and equipment needed. Establish all the responsibilities of the contractor from the very beginning to avoid disputes. Make sure you set a deadline with penalties, so you have control over the building process.

How To Mud a Drywall Archway

This is an easy to follow tutorial on how to mud edges. Therefore, for this drywall project you will need fiberglass mesh, drywall mud and a cutter. You will also need a trowel to apply the mud and to create even layers. The first step was the project is to build the archways, so now we have to mud all the edges and smooth the surface before adding the paint. If you have other techniques, I would be more than happy to hear your feedback.

Work with attention and make sure you practice on a scrap piece of drywall, if you don’t have prior experience in the field. Moreover, I also recommend you to check out more drywall projects on my blog, as I have lots of tips to offer.


How to Mud a Drywall Arch

Cutting the fiberglass mesh


Fitting-the-mesh-to-the-exteiror-corners


Applying-the-tape-to-the-joints


Applying-mud-over-the-arch


Finishing-a-drywall-arch


How-to-build-a-drywall-arch

Check out my other drywall projects, if you are in search of home improvement inspiration. Check out PART 1 so you can learn how to build the drywall arch with metal studs. See all my drywall projects and work techniques HERE.


I am really happy that you have discoverer my drywall focused blog and I hope you enjoy the content. Make sure you share the projects with your friends, by using the social media widgets.

How To Drywall An Arch

This step by step diy article is about how to drywall an arch. If you add unique appeal to your home, building a drywall arch is one of the ways to accomplish that. You can adjust the radius of the arch, as well as the width so it suit your needs. You can build the frame for the arch using lumber or metal studs, so that you choose the easiest method for you. From our experience, using with metal studs is the easiest method, as the studs won’t bend or change shape.

After buying the sheets, make sure you lay them flat in the floor, so that they don’t bend because of the humidity. Inspect the ceiling frame thoroughly before attaching the sheets, looking for leaks or uneven surfaces. This is a two part article, so make sure you check out the next article to learn how to finish the drywall arch with joint compound.


Materials

 Drywall sheet

 Joint compound

 Drywall screws

Tools

 Safety gloves, Eye protection, Respiratory mask

 Electrical screwdriver, Drywall saw

 Utility knife, T-square, Knifes

Tips

 For 1/2” drywall use 1-1/4″ drywall screws; for 5/8” drywall use 6 x 1-5/8″ screws

 Wear a respiratory mask when sanding the drywall sheets

Time

 2 days


How To Drywall An Arch

How-to-frame-with-metal-studs


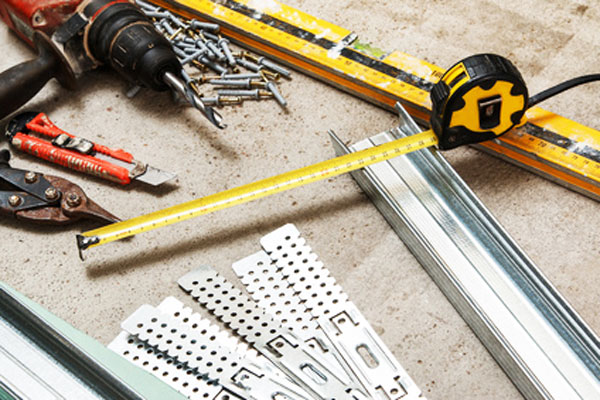
For this project you will need a piece of drywall, metal tracks, a ruler, an utility knife, a screwdriver and tin snips. Gather all the materials and tools before building the arch, so that you save time.


Step 1: Build the metal stud frame

Building-the-drywall-arch-frame


The first step of the project is to build the frame for the drywall arch. We chose metal tracks for the frame, but this can be done with lumber, as well. Use tin snips to cut the tracks and secure them to the walls with screws. Leave no gaps between the tracks and the wall.


Step 2: Cutting the faces

Cutting-the-drywall-arch-panels


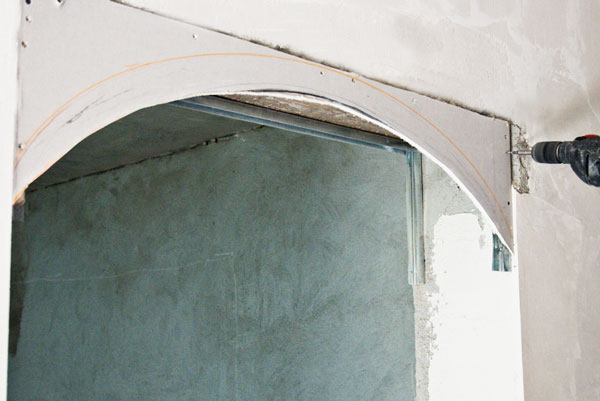
Mark the arch on a piece of drywall. Use two screws, a piece of string and a pencil to mark the curved line. You can adjust the radius of the arch by making the string shorter or longer. Use a jigsaw or a drywall saw to make the curved cut, making sure you wear a respiratory mask.


Step 3: Fitting the drywall faces

Building-a-drywall-arch


Fit the drywall pieces to metal stud frame. Use 1 1/4″ drywall screws to secure the pieces to the studs, after aligning the edges with attention. Make sure you sink the head of the screws under the surface of the drywall, so that they don’t protrude. Insert the drywall screws every 4″.


Step 4: Bending the metal studs

Bending-metal-studs


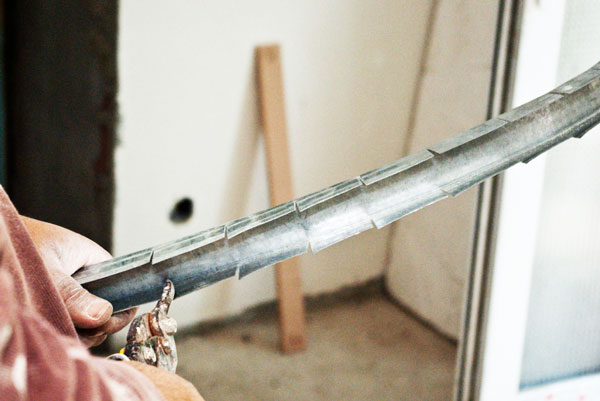
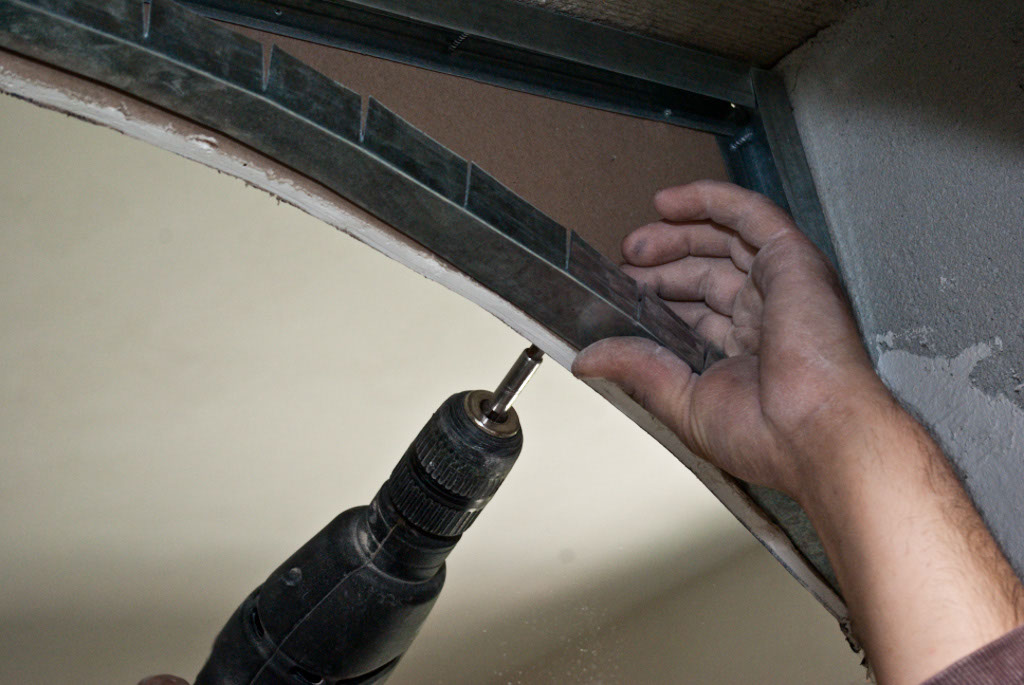
You need to metal studs along the curved edge of the drywall arch. In order to curve the metal studs, you need to make multiple cuts on the flanges of the metal tracks. Use tin snips to make the cuts, as shown in the image.


Step 5: Build a drywall arch

Dry-wall-arch


Fit the curved metal stud to the interior of the drywall arch. Align the edges with attention and drive 1 1/4″ screws from the outside into the studs. Insert screws every 6″.


Step 6: Fitting the drywall arch

Scoring-drywall


In order to complete the drywall arch, you need to attach a curved piece of drywall to the framing. Bending drywall can be done in several ways: by making parallel scores or by using water. For this project, we made parallel cuts to the piece of drywall, every 1 1/2″. Make sure you screw all the way through the paper layer into the gypsum.


Step 7: Fitting the arch

Assembling-the-drywall-arch


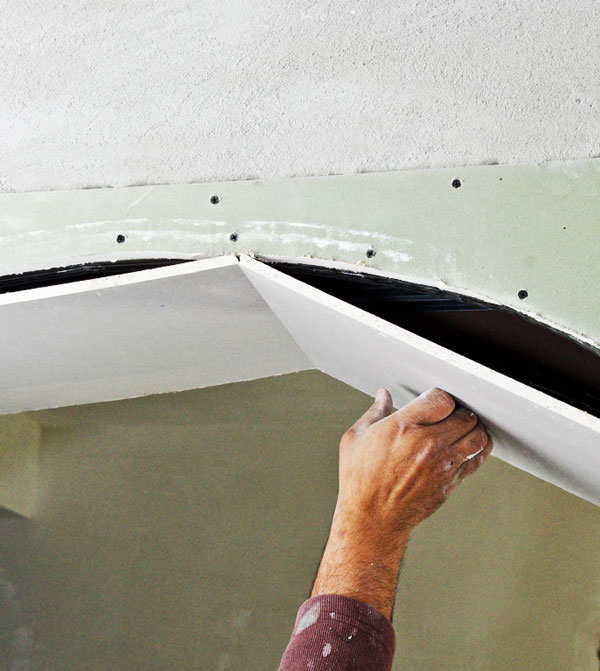
Fit the piece of drywall to the arch, making sure you place it with the cuts upward oriented. Apply steady pressure until you bow the piece of drywall to the curve of the arch. Use 1 1/4″ screws to secure the drywall to the metal studs. Insert the screws every 2″ for a professional result.


Step 8: Cutting off the excess

Cutting-off-the-excess


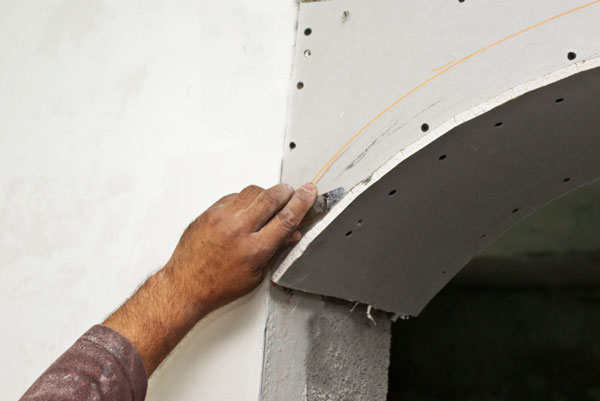
Use an utility knife to cut off the excess drywall, as seen in the image. If you want to learn how to drywall an arch in a professional manner, make sure you understand these steps before starting the actual construction.

Afterwards, take a look over PART 2 of this project to learn how to finish the drywall arch. Applying mud to the edges and taping the joints is not as easy at it might seem at first glance, so make sure you pay attention to our tutorial.


Thank you for reading our project about how to install drywall ceiling. Check out the rest of the projects if you want to learn drywall repair tricks and techniques. LIKE us on FACEBOOK for more updates.

How To Drywall A Ceiling

This step by step diy article is about how to drywall a ceiling. If you want to save money or you simply enjoy doing DIY projects on your own, this article will show you a few tips on hanging drywall to the ceiling. If you want to get a professional result, you need to follow the simple steps. Our instructions work if the ceiling frame is made from wood or from metal studs.

We recommend you to use 5/8″ thick drywall for the ceiling. After buying the sheets, make sure you lay them flat in the floor, so that they don’t bend because of the humidity. We also recommend you to ask a friend to assist you when hanging the drywall, as the sheets are too heavy for a single person to lift them. Inspect the ceiling frame thoroughly before attaching the sheets, looking for leaks or uneven surfaces.


Materials

 Drywall sheet

 Joint compound

Tools

 Safety gloves, Eye protection, Respiratory mask

 Electrical screwdriver, Drywall saw

 Utility knife, T-square, Knifes

Tips

 For 1/2” drywall use 1-1/4″ drywall screws; for 5/8” drywall use 6 x 1-5/8″ screws

 Wear a respiratory mask when sanding the drywall sheets

Time

 2 days


Step 1: Prepare the surface

Metal-stud-ceiling


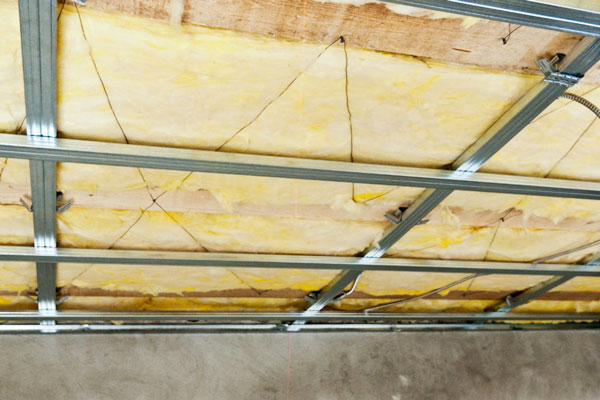
The first step of the project is to frame the ceiling. In our case, we used metal studs to make the frame for the ceiling. As you can see in the image, we also added fiberglass insulation to the ceiling. We used a laser level to make sure the tracks and the ceiling are perfectly horizontal. The metal brackets hold the studs secured to the wooden beams. See the next step to learn how to hang drywall ceiling.


Step 2: Lift the drywall sheets

Hanging-drywall-to-the-ceiling


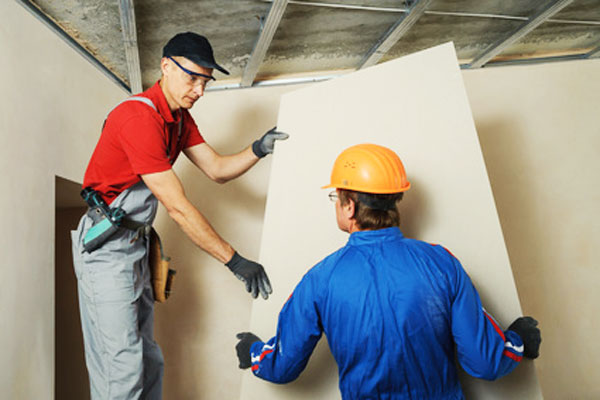
You need an extra pair of hands when installing the sheets of drywall into place. Start with a corner of the room, so that you can use a full sheet of drywall. Raise the sheet with the help of your friend and fit it to the corner. Make sure the tampered edges of the sheet are downward-oriented.


Step 3: Secure the sheets to the ceiling

Securing-drywall-sheets-to-the-ceiling


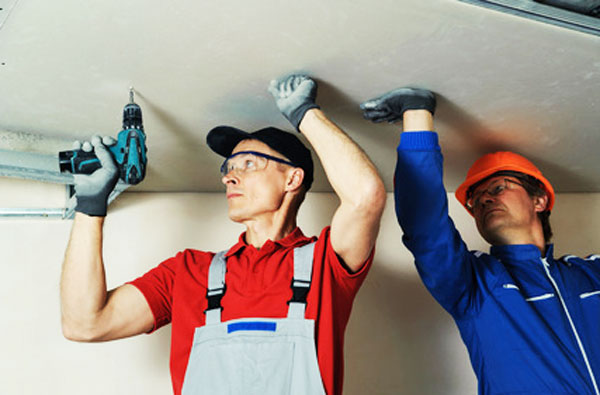
Use screws or nails to secure the sheets permanently into place. We used screws, as the ceiling structure was made of metal studs. Make sure you leave at least 3/8″ from the edges and insert the screws every 7″ along the perimeter. Along the interior stud, insert screws about every 12″. Sink the head of the screws into the paper layer, but make sure you don’t damage it.


Installing-a-drywall-ceiling


Make sure you secure the sheets along the track tightly. Leave no gaps between the wall and the ceiling for a professional result. Read the rest of the steps to learn how to drywall a ceiling as a professional.


Step 4: Adjust the sheets to size

Marking-the-cut-line-on-drywall


After completing the first row, you need to start the second one with a half sheet. This will add strength to the ceiling and prevent cracks. Use a tape measure to determine the middle of the sheet. Use a T-square to score a straight cut with the utility knife. Snap the sheet and then clean the remaining paper layer with the cutter. Use a drywall saw to make punches for wires or pipes.

Install the rest of the sheets to the metal stud ceiling, using the same techniques described above. After you cover the whole surface with drywall sheets, you should mud the seams.


Step 5: Tape the seams

Taping-drywall-ceiling-seams


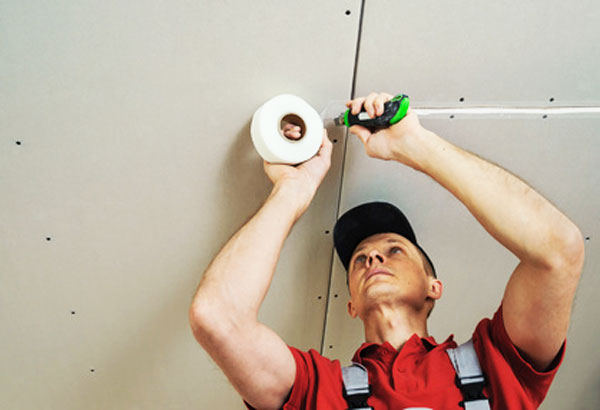
Apply fiberglass mesh to the seams. Press the sticky side to the seams, making sure you center it into place. Use an utility knife to cut the mesh. If you want to use tape, then you should first apply a coat of mud over the seam.


Mixing-drywall-compound


Mix the joint compound. Thin the mud with a little water and mix it thoroughly, until it gets the consistency of pudding. Using the mud directly from the bucket will make it hard to spread evenly, so take the time to thin it a little.


How-to-drywall-a-ceiling


Use a 6″ knife to spread an even coat of mud over the seams. Make sure the coat is about 4-6″ wide. Then, apply the tape to the joints, keeping it centered. Press the tape over the compound, every feet or so. Use the trowel to keep the tape into place, while you use the knife to go along the tape and wipe off the excess. Start from the middle and wipe it off toward the end.

Repeat the process on the remaining side of the seam. The excess mud should ooze out on both sides of the tape. If this doesn’t happen, then the mud layer applied to the seams is too thin, and you need to apply it again. After this coat it dies out, you should spread two more layers to cover everything smoothly. Make sure the new layers go 2″ beyond the edges, so the transition will be smooth.


Thank you for reading our project about how to install drywall ceiling. Check out the rest of the projects if you want to learn drywall repair tricks and techniques. LIKE us on FACEBOOK for more updates.

How To Tape and Mud Drywall

This step by step diy article is about how to tape and mud drywall. If you want to save money or you simply enjoy doing DIY projects on your own, this article will show you a few tips on taping drywall. If you want to get a professional result, you need to follow the simple steps. It would be also a good idea to practice on a small surface, so you learn the techniques.

If you want to prevent future cracks in the wall, we highly recommend you to apply an even coat of mud to the seams. Do not leave empty spaces, as there will form air bubbles. In addition, use proper tools for the job, if you want to get a smooth surface. Leave the layers of drywall to dry out properly before applying the next ones.


Materials

 Drywall sheet

 Joint compound

Tools

 Safety gloves, Eye protection, Respiratory mask

 Electrical screwdriver, Drywall saw

 Utility knife, T-square, Knifes

Tips

 Use a larger drywall knife every time you apply a new layer of mud

 Wear a respiratory mask when sanding the drywall sheets

Time

 2 days


Step 1: Hanging Drywall

Installing-drywall-sheets


First of all, you need to hang the drywall sheets to the wall frame. Make sure you align the sheets with attention, leaving no gaps between them. Use drywall screws to secure the sheets to the studs.


Step 2: Mixing the mud

Mixing-drywall-compound


Next, you need to mix the mud. Thin the joint compound with a little water and mix it thoroughly, until it gets the consistency of pudding. Using the mud directly from the bucket will make it hard to spread evenly, so take the time to thin it a little.


Applying-plaster-on-a-trowel


Use a drywall trowel and a 6″ knife to check its consistency. If you can work with it easily, then it is time to start applying the joint compound to the drywall seams.


Step 3: Filling the drywall screw holes

Plastering-the-screw-heads


If you haven’t worked before with mud, it would be a good idea start by filling the screw holes. Take some mud from the trowel with the knife and apply it over the screw holes. Make sure you spread the mud evenly, not too think not too thin.


Step 4: Tapping drywall seams

Applying-joint-compound-to-drywall


Next, apply the joint compound to the seams. Start with the horizontal seams and then go on with the vertical ones. Use the trowel or a 6″ knife to spread an even coat of mud over the seams. Make sure the coat is about 4-6″ wide. Check if the seams are covered with mud from one end to the other.

Apply the tape to the joints, keeping it centered. Press the tape over the compound, every feet or so. Use the trowel to keep the tape into place, while you use the knife to go along the tape and wipe off the excess. Start from the middle and wipe it off toward the end. Repeat the process on the remaining side of the seam. The excess mud should ooze out on both sides of the tape. If this doesn’t happen, then the mud layer applied to the seams is too thin, and you need to apply it again.

Next, you need to tackle the corners. Apply mud to the both sides of the corners with a 6″ knife.Fold the tape on half before applying it to the corners. Apply the tape to the corners and crease it down the middle, using your fingers. Use the 6″ knife to wipe off the excess on both sides of the tape.


Taping-the-drywall-seans


If you prefer using fiberglass mesh, then remember that you should attach it to the seams before spreading the first coat of mud. The fiberglass mesh has glue on one side, so it is easy to stick it to the seams. Apply the mesh, making sure there are no folds.


Step 5: Applying the second coat

How-to-tape-drywall


Leave the first coat of compound to dry from about 12 hours. Use a slightly larger 8″ drywall knife to apply a second coat of compound over the seams. Make sure you apply the second coat evenly, so that the second coat is 2″ wider than the first. Apply a second coat over the screw holes. Leave the second coat to dry out for 12 hours.


Step 6: Applying the third coat

Sanding-the-drywall-compound


Smooth the rough surfaces with sandpaper. Use 120-150 grit sandpaper for a smooth surface. Wear a respiratory mask to avoid inhaling the dust.


Large drywall knife


For the third coat, thin the compound with water. Aim for the consistency of mayonnaise. Use a 10-12″ drywall knife to apply the third layer of compound. Feather the edges 2″ over the second coat. Leave the compound to dry out for several hours.


How-to-mud-drywall


Use a damp sponge to even out the surface. Now your wall is ready for priming and then painting. Make sure you understand the whole process before starting taping the drywall, so you get a professional result.


Thank you for reading our project about how to tape and mud drywall. Check out the rest of the projects if you want to learn drywall repair tricks and techniques. LIKE us on FACEBOOK for more updates.