
This step by step diy article is about how to drywall an arch. If you add unique appeal to your home, building a drywall arch is one of the ways to accomplish that. You can adjust the radius of the arch, as well as the width so it suit your needs. You can build the frame for the arch using lumber or metal studs, so that you choose the easiest method for you. From our experience, using with metal studs is the easiest method, as the studs won’t bend or change shape.
After buying the sheets, make sure you lay them flat in the floor, so that they don’t bend because of the humidity. Inspect the ceiling frame thoroughly before attaching the sheets, looking for leaks or uneven surfaces. This is a two part article, so make sure you check out the next article to learn how to finish the drywall arch with joint compound.
Materials
![]() Drywall sheet
Drywall sheet
![]() Joint compound
Joint compound
![]() Drywall screws
Drywall screws
Tools
![]() Safety gloves, Eye protection, Respiratory mask
Safety gloves, Eye protection, Respiratory mask
![]() Electrical screwdriver, Drywall saw
Electrical screwdriver, Drywall saw
![]() Utility knife, T-square, Knifes
Utility knife, T-square, Knifes
Tips
![]() For 1/2” drywall use 1-1/4″ drywall screws; for 5/8” drywall use 6 x 1-5/8″ screws
For 1/2” drywall use 1-1/4″ drywall screws; for 5/8” drywall use 6 x 1-5/8″ screws
![]() Wear a respiratory mask when sanding the drywall sheets
Wear a respiratory mask when sanding the drywall sheets
Time
![]() 2 days
2 days
How To Drywall An Arch
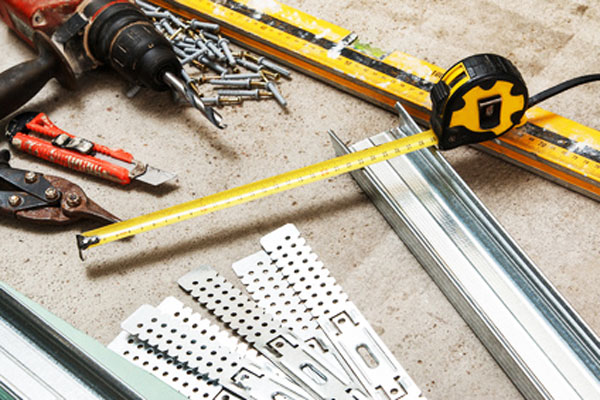
For this project you will need a piece of drywall, metal tracks, a ruler, an utility knife, a screwdriver and tin snips. Gather all the materials and tools before building the arch, so that you save time.
Step 1: Build the metal stud frame
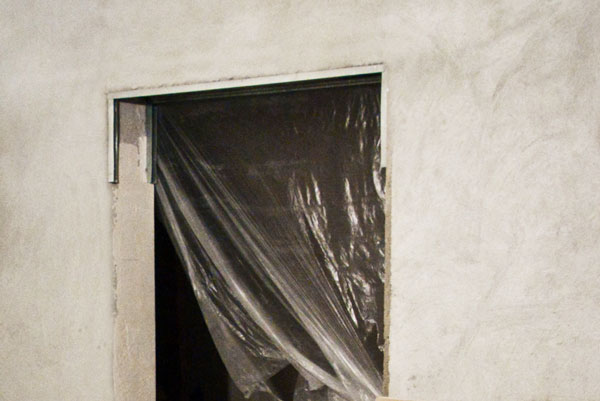
The first step of the project is to build the frame for the drywall arch. We chose metal tracks for the frame, but this can be done with lumber, as well. Use tin snips to cut the tracks and secure them to the walls with screws. Leave no gaps between the tracks and the wall.
Step 2: Cutting the faces
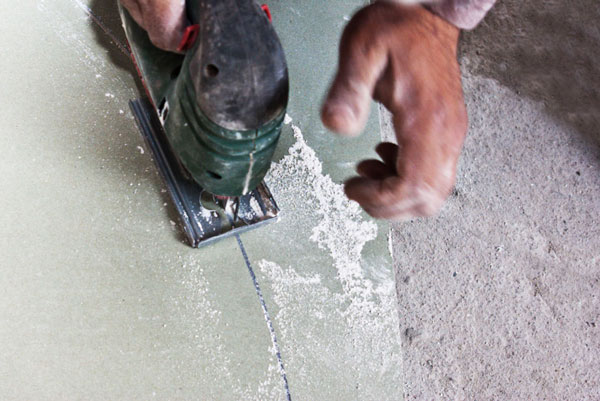
Mark the arch on a piece of drywall. Use two screws, a piece of string and a pencil to mark the curved line. You can adjust the radius of the arch by making the string shorter or longer. Use a jigsaw or a drywall saw to make the curved cut, making sure you wear a respiratory mask.
Step 3: Fitting the drywall faces

Fit the drywall pieces to metal stud frame. Use 1 1/4″ drywall screws to secure the pieces to the studs, after aligning the edges with attention. Make sure you sink the head of the screws under the surface of the drywall, so that they don’t protrude. Insert the drywall screws every 4″.
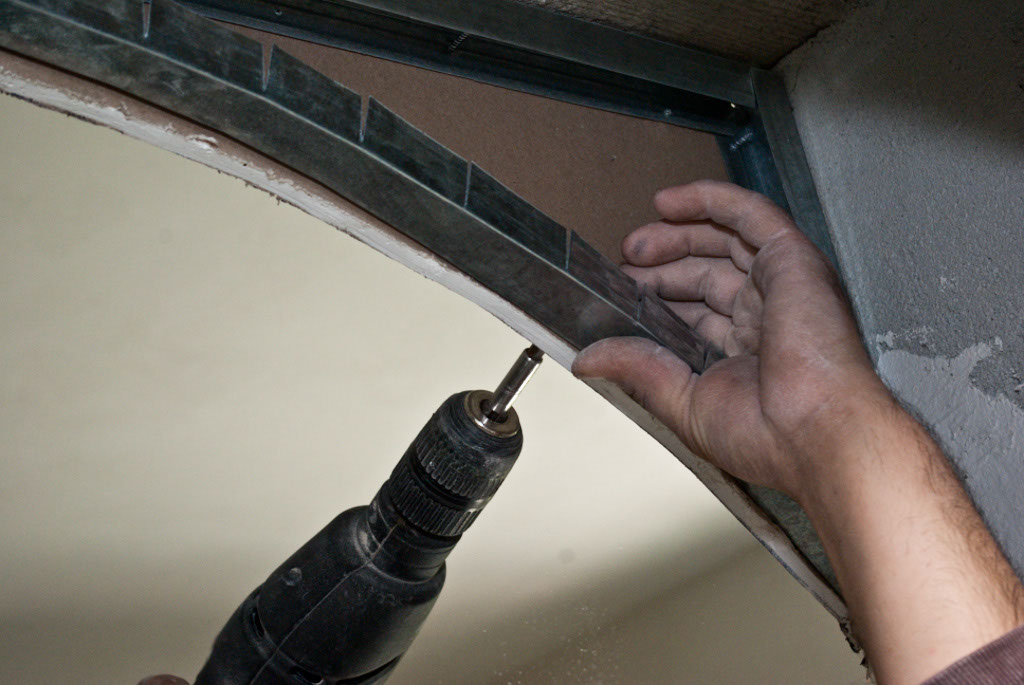
Step 4: Bending the metal studs
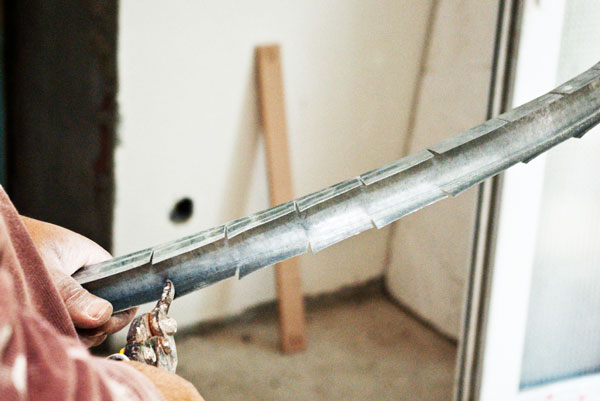
You need to metal studs along the curved edge of the drywall arch. In order to curve the metal studs, you need to make multiple cuts on the flanges of the metal tracks. Use tin snips to make the cuts, as shown in the image.
Step 5: Build a drywall arch
Fit the curved metal stud to the interior of the drywall arch. Align the edges with attention and drive 1 1/4″ screws from the outside into the studs. Insert screws every 6″.
Step 6: Fitting the drywall arch
In order to complete the drywall arch, you need to attach a curved piece of drywall to the framing. Bending drywall can be done in several ways: by making parallel scores or by using water. For this project, we made parallel cuts to the piece of drywall, every 1 1/2″. Make sure you screw all the way through the paper layer into the gypsum.
Step 7: Fitting the arch
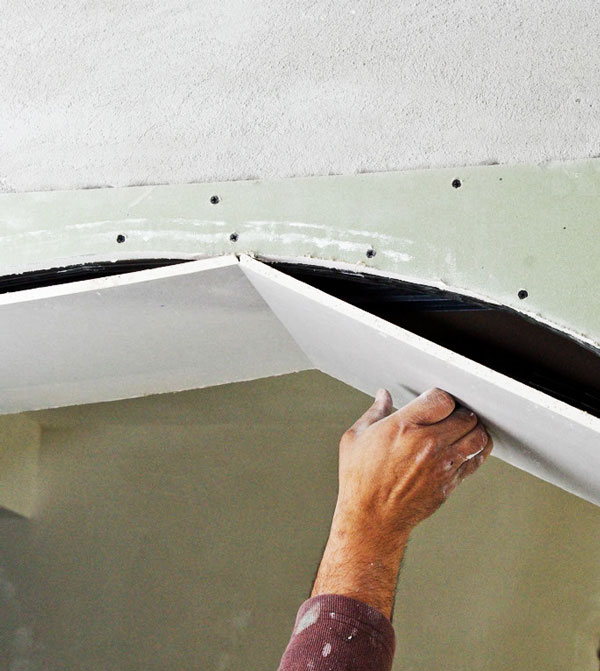
Fit the piece of drywall to the arch, making sure you place it with the cuts upward oriented. Apply steady pressure until you bow the piece of drywall to the curve of the arch. Use 1 1/4″ screws to secure the drywall to the metal studs. Insert the screws every 2″ for a professional result.
Step 8: Cutting off the excess
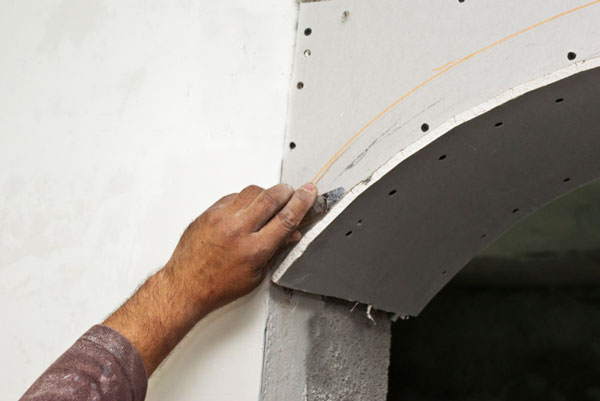
Use an utility knife to cut off the excess drywall, as seen in the image. If you want to learn how to drywall an arch in a professional manner, make sure you understand these steps before starting the actual construction.
Afterwards, take a look over PART 2 of this project to learn how to finish the drywall arch. Applying mud to the edges and taping the joints is not as easy at it might seem at first glance, so make sure you pay attention to our tutorial.
Thank you for reading our project about how to install drywall ceiling. Check out the rest of the projects if you want to learn drywall repair tricks and techniques. LIKE us on FACEBOOK for more updates.